The Best Mess Free Way to Dye Easter Eggs with Cool Whip
Dye Easter Eggs can get messy, but here we are for you! We are sharing with you and your family the easiest, mess-free, and funniest way to get your colorful eggs ready for this celebration.

Every year, I tell myself the same thing. This is going to be the year Easter egg decorating goes smoothly. Spoiler alert. It never does. At least, it never did until this year.
I have three kids, and my youngest is six. She loves glitter, rainbows, and all things messy, so naturally, dying Easter eggs is one of her favorite holiday traditions. But for me? It has always been a little chaotic. Between the cups of colored water, cracked eggs, stained hands, and someone always knocking something over, I used to dread it.
This year, I needed a solution that did not leave my kitchen looking like a craft store exploded. That is when I decided to try dying Easter eggs with Cool Whip and honestly, it completely changed the game.
New Easter Egg Dye Method
We love holidays in our house, but as a mom, I am also realistic. If an activity involves a lot of setup, a guaranteed mess, and a big cleanup window, I usually have to weigh whether it is worth it. Dyeing eggs was starting to feel like a chore instead of a memory maker.
My daughter, of course, was already dreaming up egg designs and asking if she could use glitter again this year. I was dragging my feet, picturing another dye covered disaster. Then one night while scrolling through ideas, I found this method for dying eggs with Cool Whip. It looked fun, easy, and most importantly, mess contained. We decided to give it a try.
And honestly, it was the easiest and most beautiful egg decorating experience we have ever had.
How to Dye Easter Eggs with Cool Whip
If you are ready to make egg decorating fun again, here is exactly how we did it. It is simple, colorful, and surprisingly calming. Plus, the cleanup was a dream.
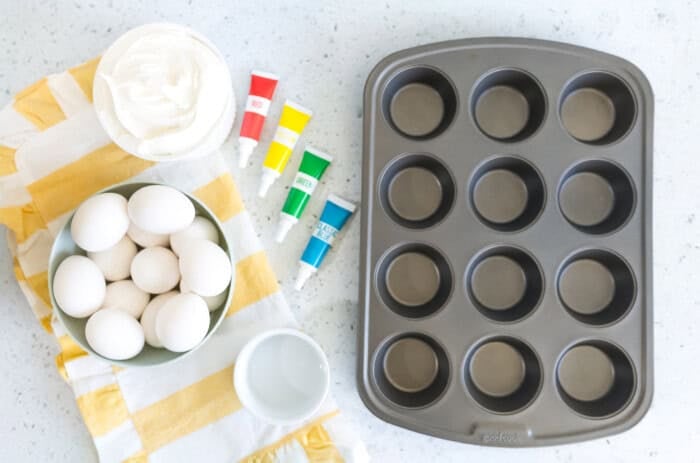
What you need:
- Hard boiled eggs
- White vinegar
- Cool Whip or any whipped topping
- Gel food coloring
- A muffin tin
- Wooden skewers A bowl of cold water
Step by step instructions:
- Start by boiling your eggs and letting them cool. Once they are ready, soak them in white vinegar for five to ten minutes. This helps the color stick better and makes the final eggs more vibrant.
- Gently dry the eggs with paper towels and set them aside.
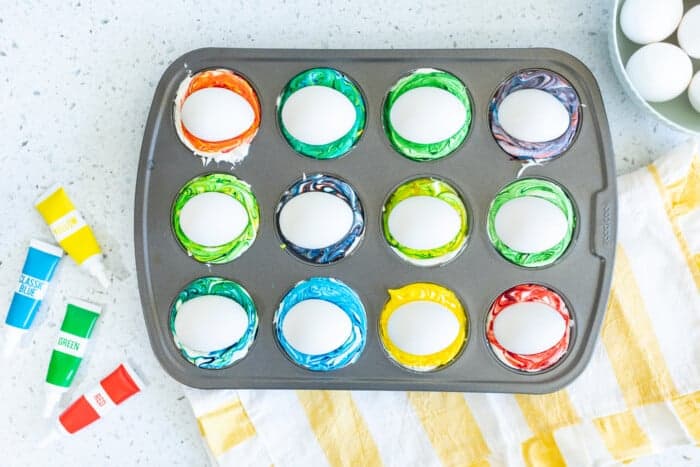
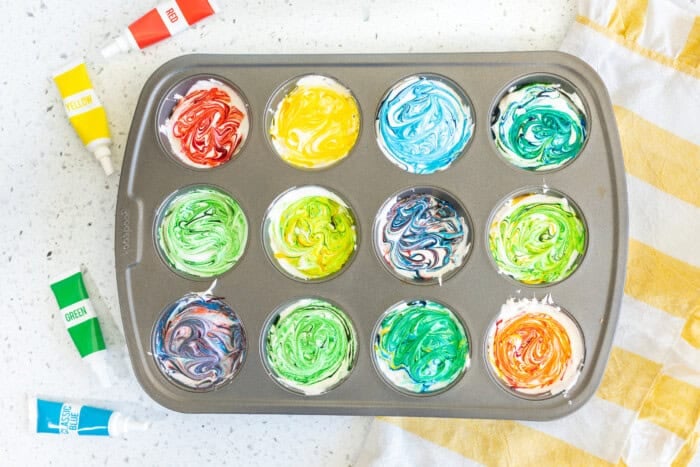
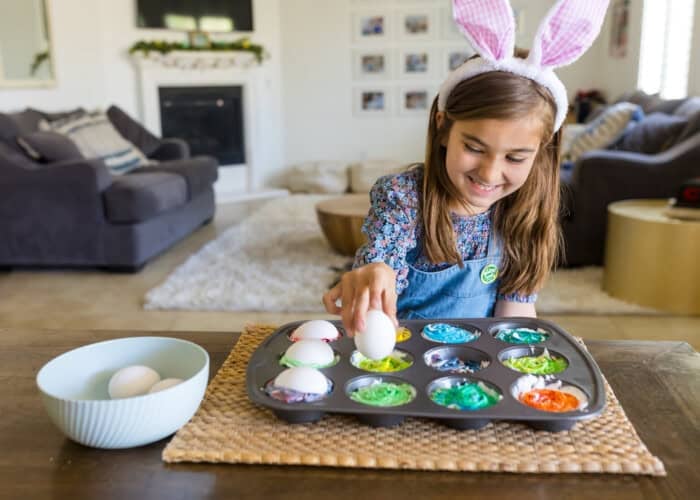
- Spoon a dollop of Cool Whip into each section of a muffin tin. This makes it easy to try different color combos and keeps everything neat.
- Add a few drops of food coloring to each section. Use a wooden skewer or a toothpick to gently swirl the color into the Cool Whip. Be careful not to overmix. You want swirls, not brown mush.
- Place one cooled egg into each muffin cup and roll it around until it is fully coated. Then let the egg rest in the Cool Whip. Let them sit for at least ten minutes. For bolder colors, let them stay a little longer. You can even put the whole muffin tin in the fridge if you want to be extra safe about food handling.
- When time is up, remove the eggs and give them a quick rinse in a bowl of cold water. Wipe off any extra Cool Whip with a paper towel and admire the magic.
That is it! No spills. No stress. And the prettiest Easter eggs we have ever made!
My daughter was all in from the moment we started. She loved picking the colors and swirling the patterns. I loved that everything stayed in one place and I did not have to hover with a sponge. The eggs turned out looking like tie dyed marbled masterpieces. Each one was completely unique.
This was not just a win for mess control. It was a win for creativity and connection. We laughed, we experimented, and we even FaceTimed the aunts to show off our creations.
A Few Tips Before You Try It
- Make sure the eggs are cool before you roll them
- Gel food coloring gives more vibrant results but liquid works too
- Keep the swirling light and fun. Too much mixing makes muddy colors
- If your kids are like mine, they will want to mix their own combos. Just go with it
Our New Favorite Easter Tradition

I can honestly say this was the most relaxed and fun Easter egg decorating we have ever done. No fights over spilled dye. No cleanup meltdown. Just a sweet afternoon of creativity with my girl.
If you are looking for a new tradition this Easter or just a better way to dye eggs with your kids, try this Cool Whip method. It turned a task I used to avoid into a moment we both looked forward to. And that is the kind of holiday magic I will take any day.
Check out our tips on how to dye eggs with blueberries; there are other ways of adding color to your Easter eggs naturally.
Happy Easter!